Add Cookie Consent to your Raspberry Pi hosted Ghost blog
Mmm, cookies! Unfortunately, we're not talking about the edible ones, but the ones that keep track of certain information about you. Be sure to warn your visitors of this too.


Have you ever wondered why you have to click on various pop-up banners whenever you visit a website, usually referring to cookies? Well, thanks (no thanks?) to the EU Cookie Law, website owners need to display a warning that tells visitors that cookies will be downloaded when visiting their website.
But why?
Well, cookies contain information about your browsing habits. However, not all this is a bad thing! For example, when you log into a website and tick the "Remember me" box, a cookie remembers this so you don't need to login every time.
Some advertisers use cookies to show you adverts of products you may have shown some interest in (for example, have you ever noticed that when you look on Amazon that adverts for the same or similar products appear on various websites you visit later on?) which can be a little invasive.
Cookie Consent
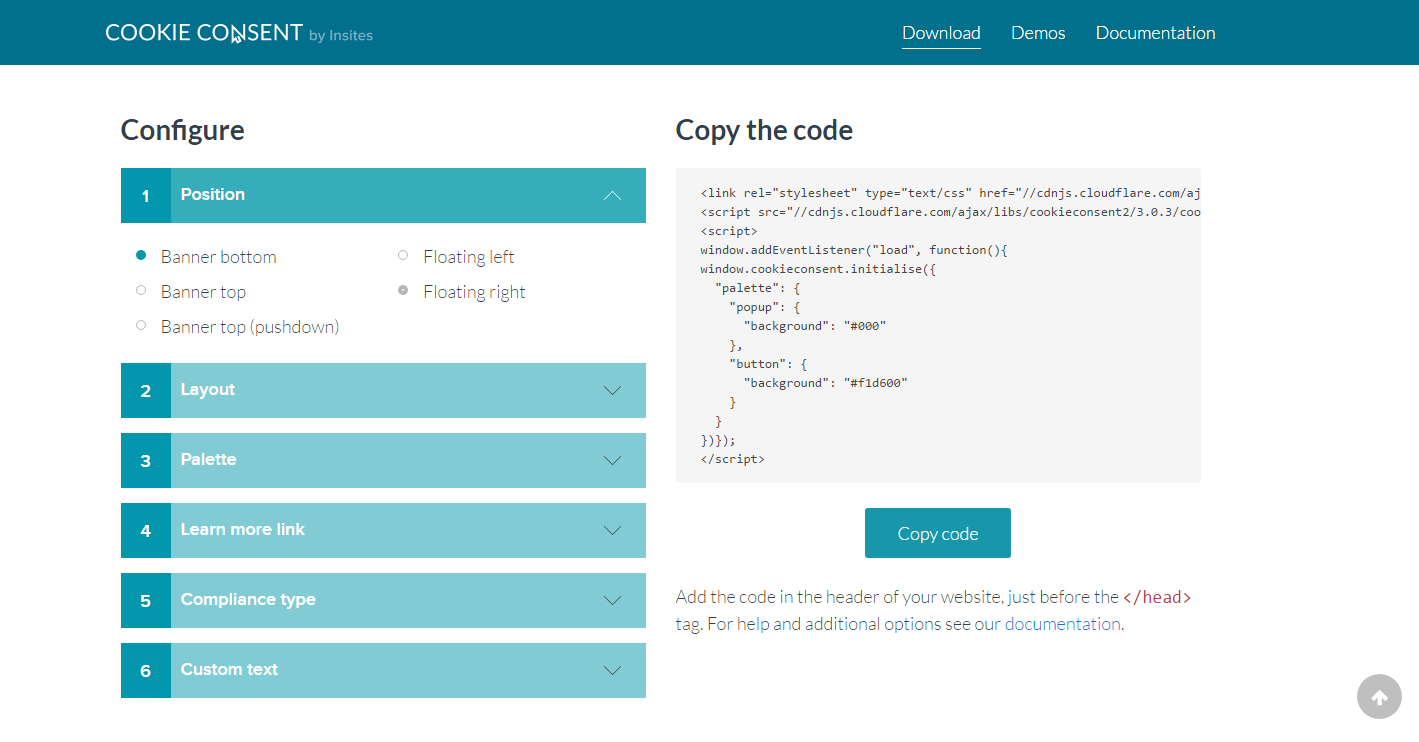
If you want to ensure your Raspberry Pi hosted Ghost blog complies with the EU Cookie Law, then thankfully it is easy to add a Cookie Consent banner that your visitors can acknowledge when they visit your site for the first time. The Cookie Consent tool by Insites is a free, open-source tool that makes adding the warning very simple!
- Head over to the Cookie Consent by Insites download page
- Configure the tool to your liking by following the easy-to-follow steps 1 through to 6
- Choose where you want the banner to appear, set the layout style of the banner as well as the colour palette
- If you have your own privacy policy on your site (take a look at Ghost Pi's Privacy Policy for an example), you can link to it in step 4, or you can use Insites' version
- Select the compliance type (if you're unsure, use the default value as it is the most simple one)
- Customise the wording of the message if you like!
- Copy the code on the right-hand side (it dynamically changes as you make changes - pretty neat!)
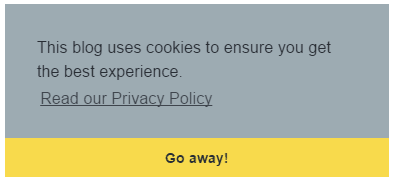
Here is the default example:
<link rel="stylesheet" type="text/css" href="//cdnjs.cloudflare.com/ajax/libs/cookieconsent2/3.0.3/cookieconsent.min.css" />
<script src="//cdnjs.cloudflare.com/ajax/libs/cookieconsent2/3.0.3/cookieconsent.min.js"></script>
<script>
window.addEventListener("load", function(){
window.cookieconsent.initialise({
  "palette": {
    "popup": {
      "background": "#000"
    },
    "button": {
      "background": "#f1d600"
    }
  }
})});
</script>
Add to Ghost
In order to add the cookie consent banner to your Ghost blog, you now need to log into your Ghost admin area and then head to Code Injection. You will now need to paste the code you just copied into the Blog Header section. Once pasted, click the Save button.
Now, if you visit your own blog (you might need to refresh the page) you should see your new Cookie Consent banner appear!
And there you have it. Your Raspberry Pi hosted Ghost blog now complies with the EU Cookie Law!
If you found this guide, as well as any other guides on Ghost Pi helpful, then if you wanted to buy Ghost Pi a coffee to show your support, then that would be greatly appreciated! As this site does not use any form of adverts, all the costs for running and maintaining the blog are done voluntarily so any extra would be fantastic!
